
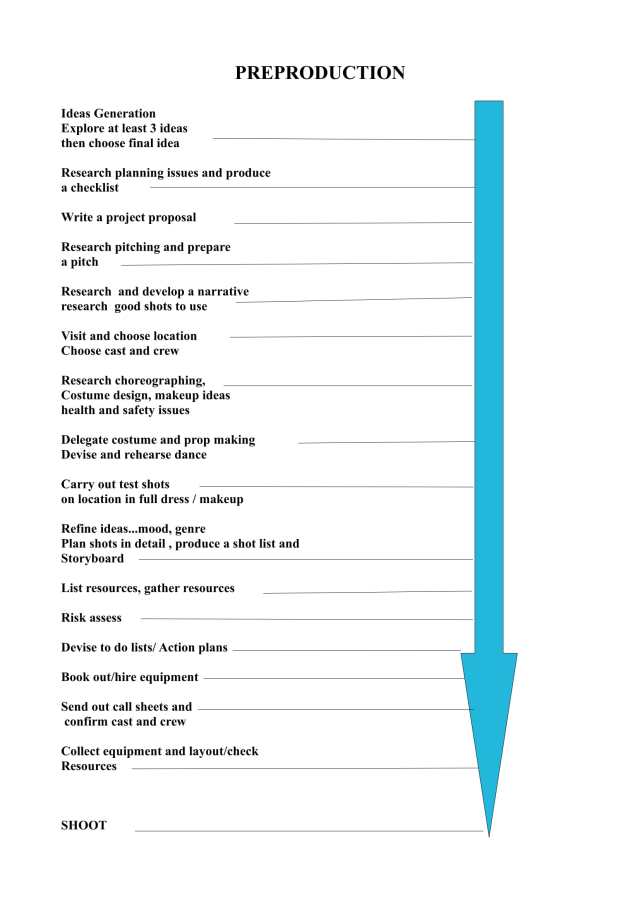
Planning My FMP
After I had explored my decision of what I wanted to film, I researched what other Filmmakers advise you to do when making a short film and took a good look at the requirements my tutor had given me for this unit. I knew from the outset that I had a lot of postproduction /vfx to do for this film and so my main planning aim was to ‘crack on‘ and shoot as soon as possible. This would not only mean I had more time to do the vfx but would more likely to be able to book the equipment out at college without any competition for it. I produced myself the following checklist of all the things I knew that I needed to do, and I will upload evidence of having done each of these in the relevant sections, as my project progresses :
-
write a detailed project proposal
-
produce a timeline/schedule to help keep myself on track
-
produce a production diary recording my activities, any changes in plans, and to regularly review and evaluate my progress
-
visit a couple of locations to consider there suitability, check the sun position and best times of day to shoot at the locations.
-
confirm my cast and crew
-
limit my resources to £50 that my parents have given me as a budget
-
carry out and document my primary and secondary research on relevant areas including how to :- develop the narratve, plan a short film, choreograph a dance, design a costume, what sort of shots to do, apply various vfx, pitch my film etc.
-
prepare to pitch my idea to Rebecca Day
-
delegate some tasks such as costume making and the actual drawing
of my storyboard ideas
-
decide on the overall genre and mood I wanted for my film and work with my storyboarder to put my ideas on paper for my crew
-
plan my shots and produce a shot list
-
rehearse and carry out test shots in costume and at location
-
produce resources lists for the shoot day and action plans to prepare for the shoot and help it to run smoothly.
-
Produce call sheets and either produce a health and safety risk assessment with the advice of my mother or delegate this to her.
-
Shoot my film
-
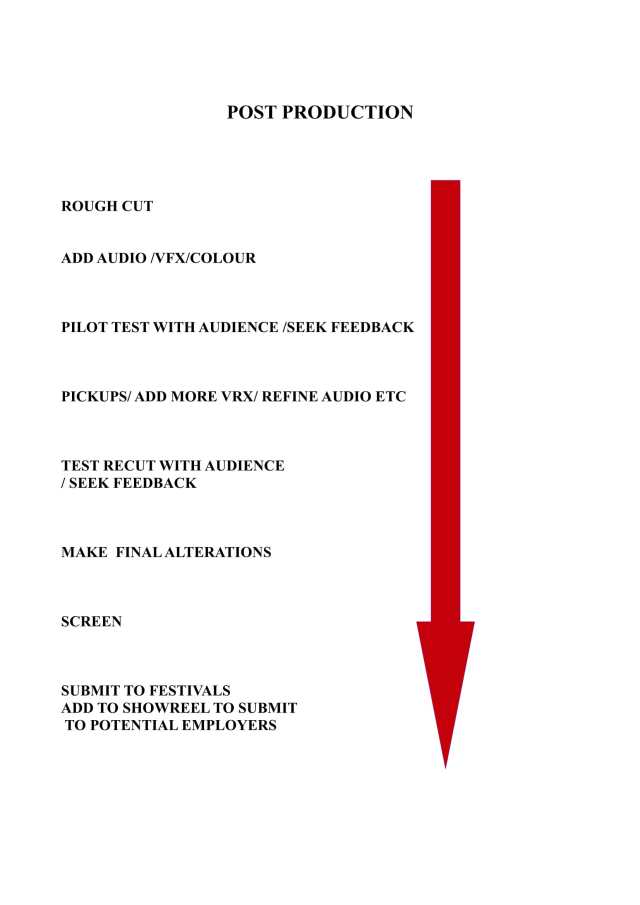
Prioritise my audio.
-
Edit, my film.
-
Refine and recut my film in response to constructive feedback
-
Write up how my film has developed and evaluate my project.
-
Produce a bibliography on the reference material I have used.
-
Prepare a presentation for the final screening of my film.
-
Add my film to my showreel, vimeo and youtube accounts, for prospective employers to view.
One Week prior to Shoot To Do List : Action plan
-
Check weather forecast to ensure it will be suitable to film. Add weather details to call sheet.
-
Confirm camera equipment is booked out with college
-
Confirm cast and crew still available and email or post them call sheets, check everyone has lifts, maps, directions etc
-
Go through resources list to ensure everything will be available for the shoot…..highlight any missing items and check with mum/zoe when will be bought or made.
-
Check and refine shot list if required
To Do List Action Plan for : Day Before Shoot
-
Lay out all the camera and lighting equipment and systematically check the lenses are clean, SD cards formatted and cleared, Batteries charged including spares, tripod and shoulder rig working and all parts available. Reflectors packed etc
Pack equipment you have checked in protective cases and put in corner of room ready to load the car.
-
Lay out each performers costume in separate neat piles and check everything is in a good state of repair and clean……..check from each characters top to toe that all items are there.
Lay out all props and check in useable condition including :
Amulet
Waterbottle
Goggles
Travellers stick
-
Lay out makeup kit and ensure black snazzaroo is enclosed and clean brushes and water available….
-
Check First Aid Kit stocked. To include: eye wash, sun cream, insect repellent, pads and bandages, tape, scissors, antiseptic cream, pain killers. Place in corner of room with checked equipment.
-
Check mobile phone charged
-
Store in the corner of the room :- the rake, shelter tent, box with wood, matches, firelighters, umberella, plastic bags, gaffa tape, electricians tape, dressing gowns and warm blankets.
-
Check music cd is in the tape recorder and that it is working and spare batteries are available…..store in corner of room ready to go.
-
Confirm with cast and crew that they are still attending and have call sheets, risk assessments, times, lifts, map and directions etc
-
Go through your resources list and tick off all items ready.
-
Check call sheet, risk assessment, resource list and shot lists are in a file with pens.
-
Check food and drinks will be made up and available for shoot.
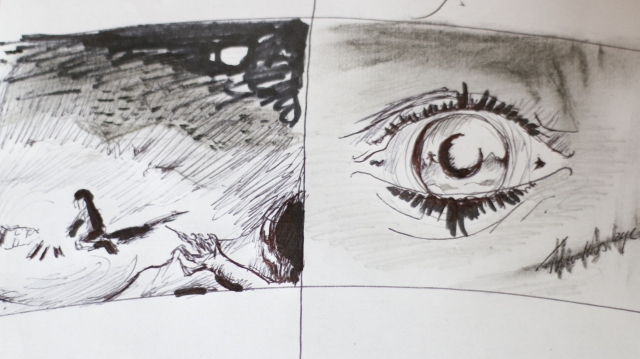
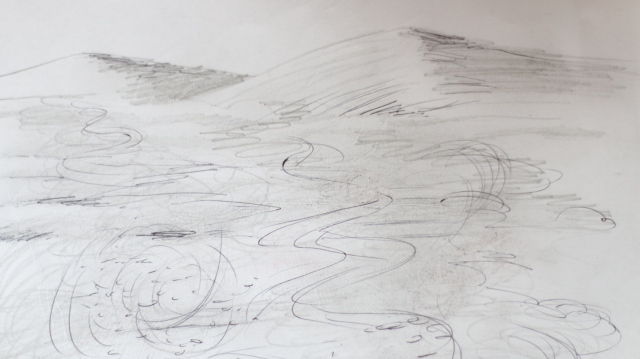
Story Board Frames
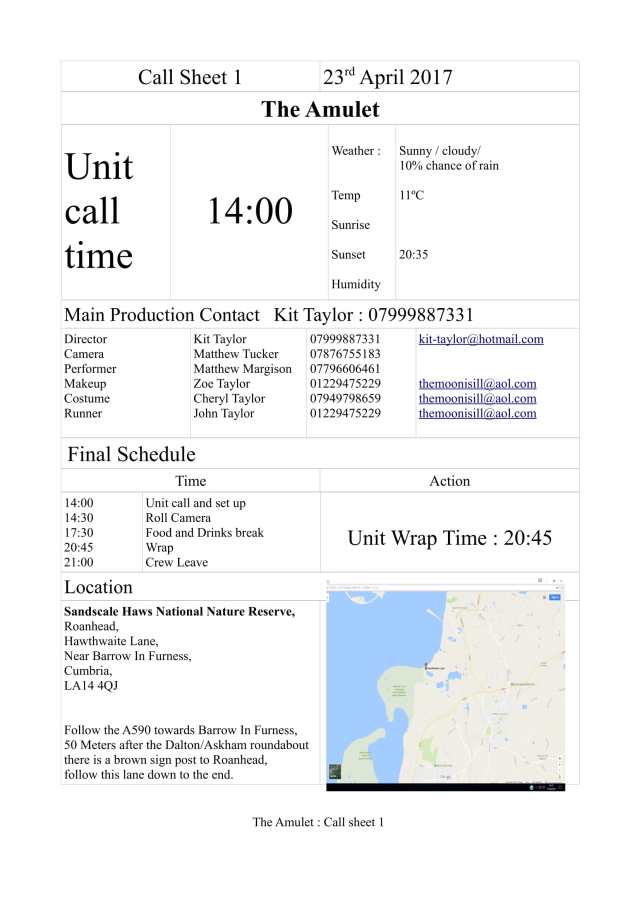
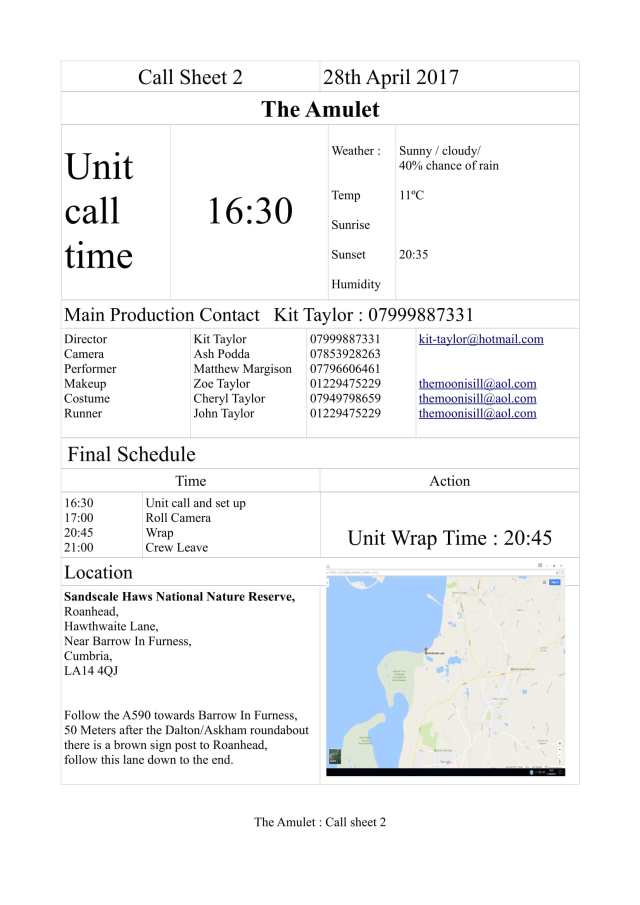
Call Sheets
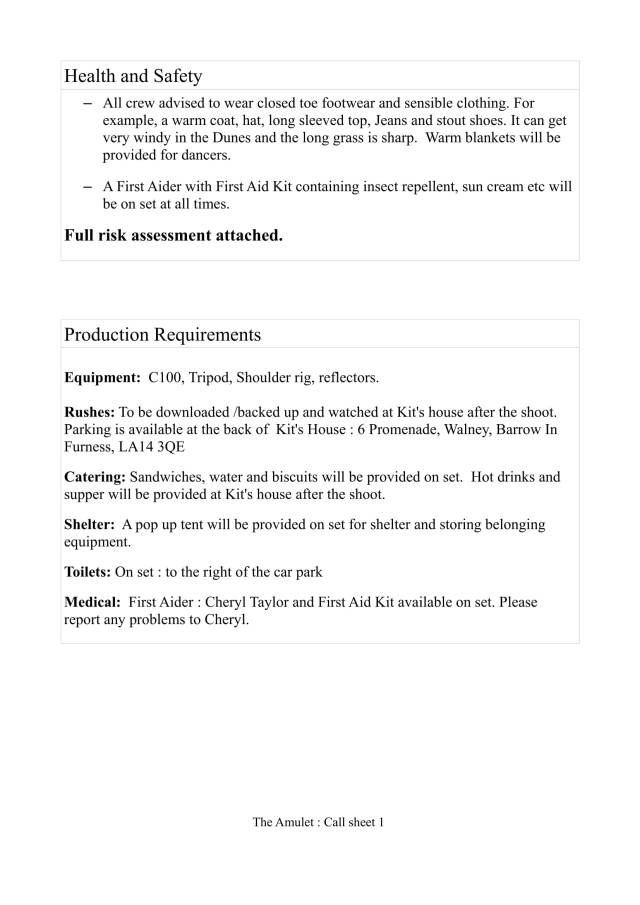
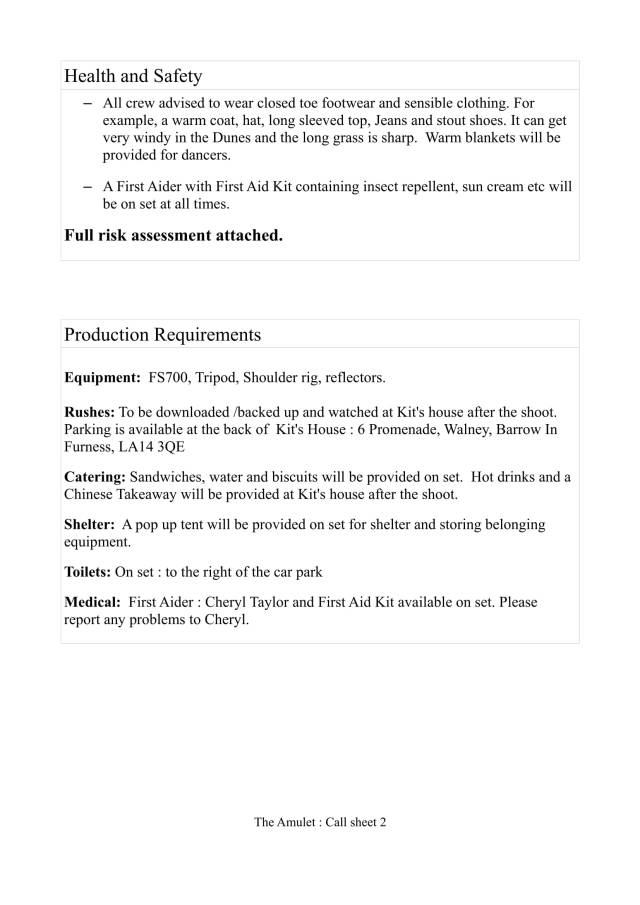
Risk Assessment for Shoot Days

Shot Lists (Day 1 & 2)
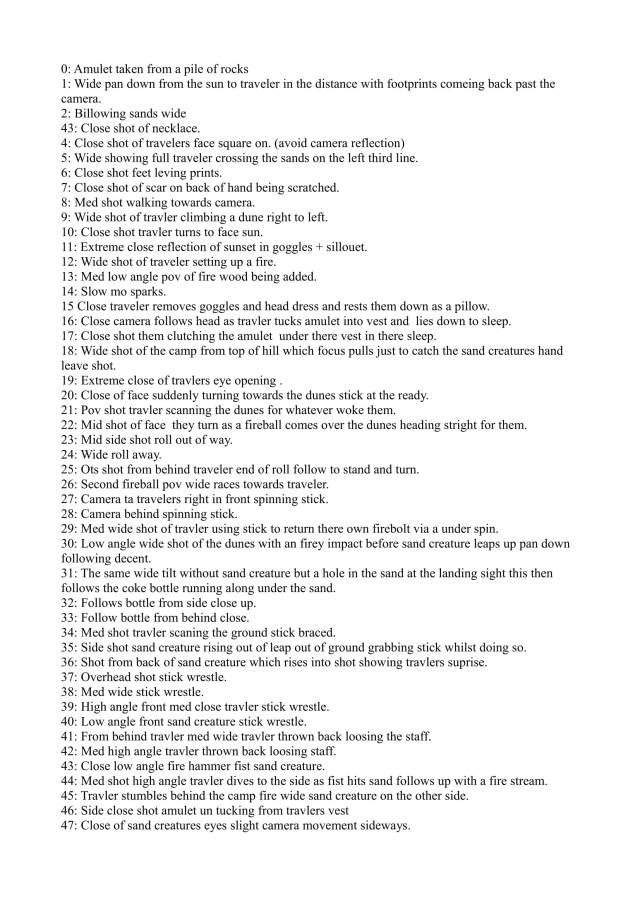
Shot Justifications:
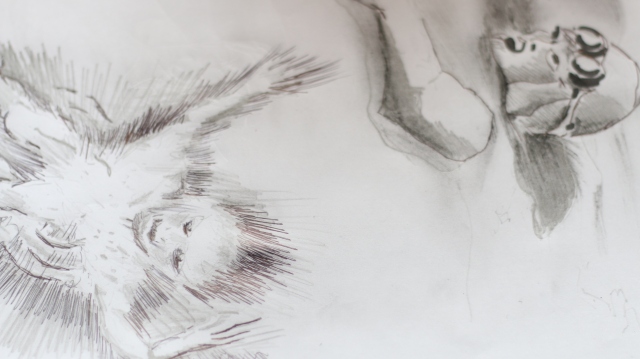
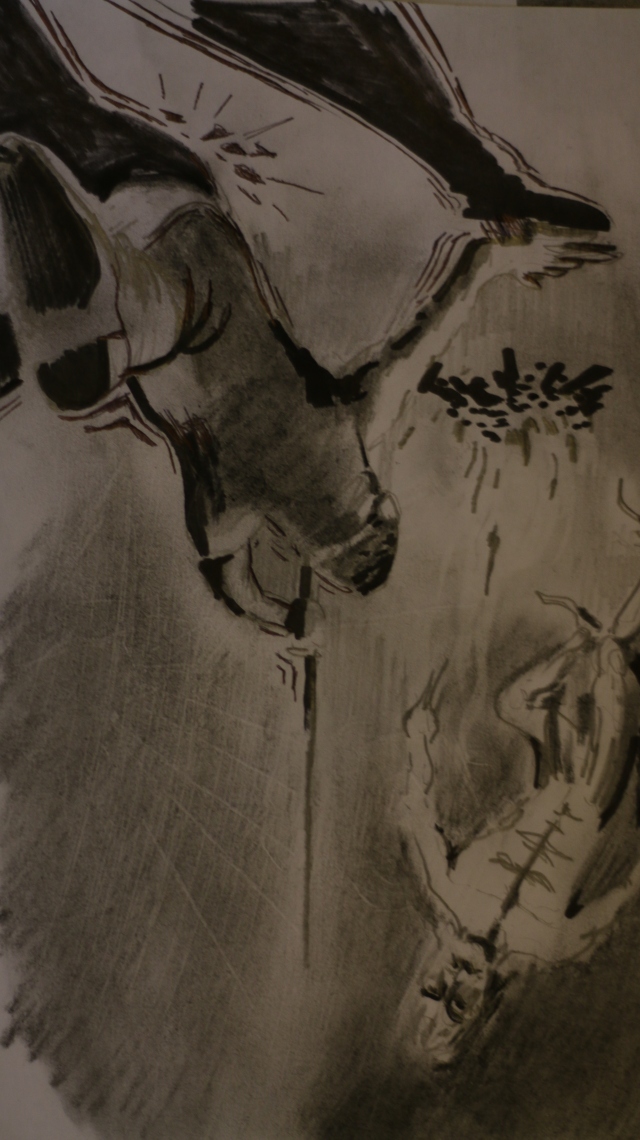
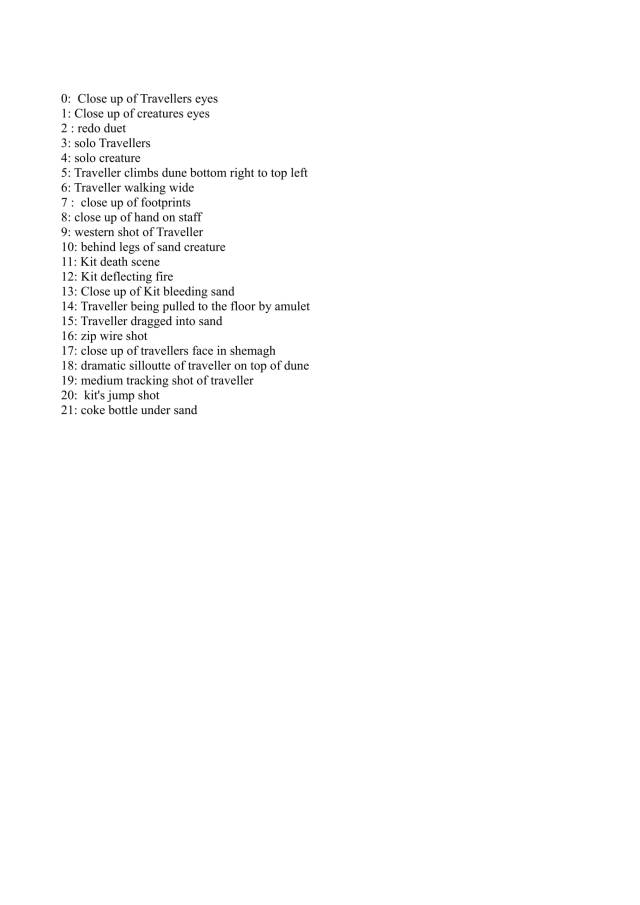
0: Amulet taken from a pile of rocks – Shows amulet being taken still with shallow dof to emphasize importance
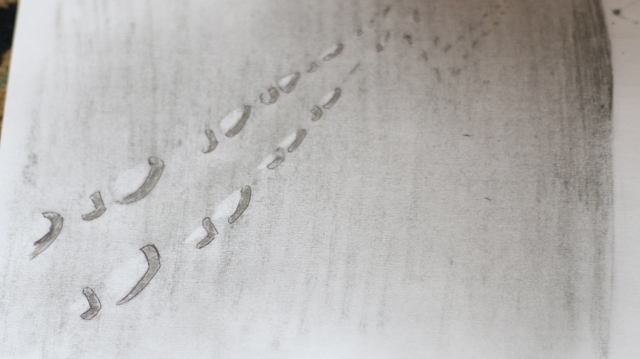
1: Wide pan down from the sun to traveler in the distance with footprints coming back past the camera. – Establishes vast desolate environment and shows that the traveler is aiming to leave the desert.
2: Billowing sands wide – Shows desolation and unforgiving environment.
3: Close shot of necklace. – Centered for importance.
4: Close shot of travelers face square on. (avoid camera reflection) – Introduces character yet despite the closeness there is still mystery to them.
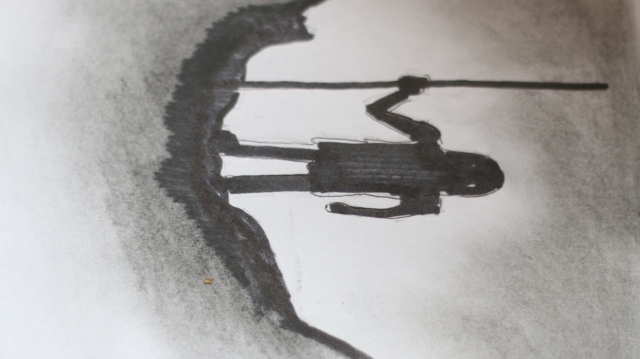
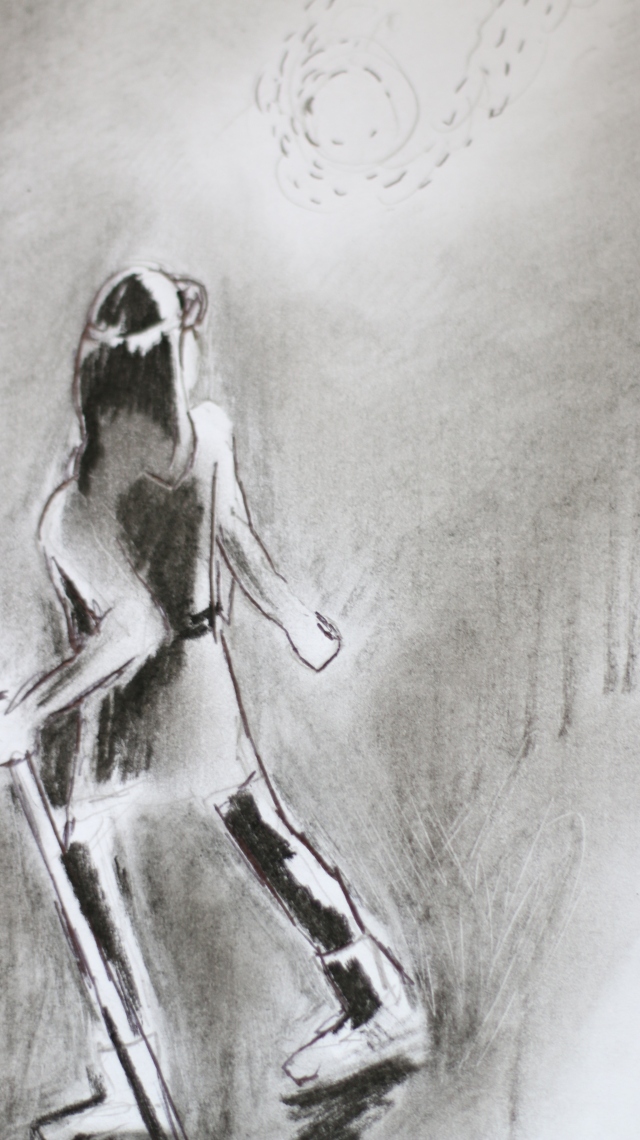
5: Wide showing full traveler crossing the sands on the left third line. – Establishes them as a protagonist.
6: Close shot feet leaving prints. – Ambience / filler that also suggests tiredness and effort.
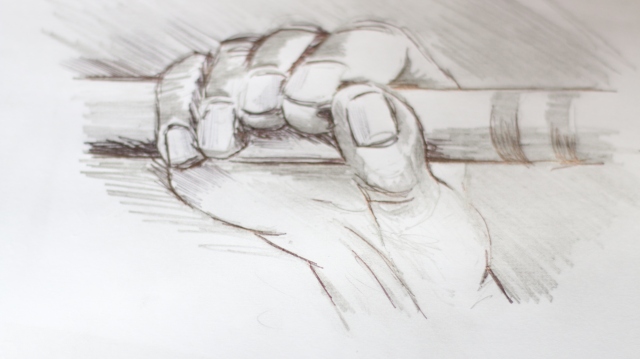
7: Close shot of scar on back of hand being scratched. – Hints that something is wrong.
8: Med shot walking towards camera. – Shows that they are now walking towards danger (trap).
9: Wide shot of traveler climbing a dune right to left. – Shows difficulty as it goes against gravity and “western” reading direction.
10: Close shot traveler turns to face sun. – Shows awareness of time
11: Extreme close reflection of sunset in goggles + silhouette. – Dramatic pause calm before storm.
12: Wide shot of traveler setting up a fire. – Shows their abilities and sets them up with an element of comfort.
13: Med low angle pov of firewood being added. – Shows their dominance of the element.
14: Slow mo sparks. – Aesthetic appeal.
15 Close traveler removes goggles and head dress and rests them down as a pillow. – Comfort but also slight vulnerability.
16: Close camera follows head as traveler tucks amulet into vest and lies down to sleep. – Comfort and vulnerability.
17: Close shot them clutching the amulet under there vest in their sleep. – Shows amulets preciousness.
18: Wide shot of the camp from top of hill which focus pulls just to catch the sand creatures hand leave shot. – hints danger rack focus for mystery.
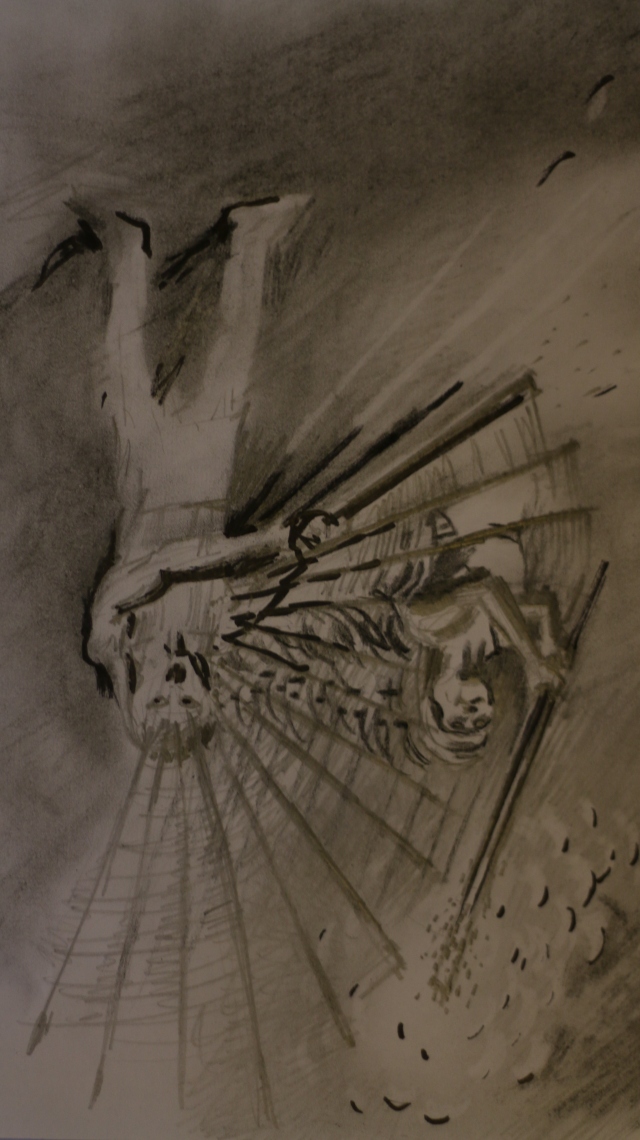
19: Extreme close of travelers eye opening. – Shows suddenness and creates an intimacy with the character.
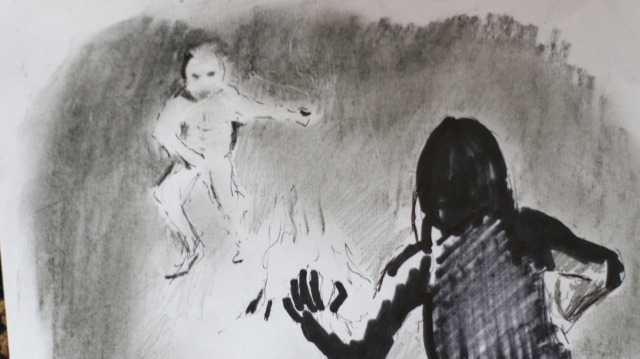
20: Close of face suddenly turning towards the dunes stick at the ready. – Shows anxiety.
21: Pov shot traveler scanning the dunes for whatever woke them. – Suspense
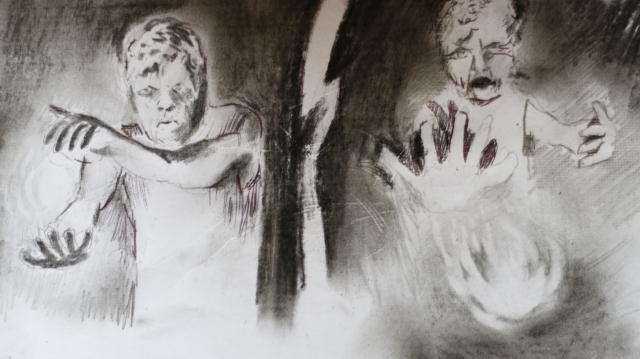
22: Mid shot of face they turn as a fireball comes over the dunes heading straight for them. – Kick starts the fight / dance sequence by breaking tension.
23: Mid side shot roll out of way. – Flowing movement with slight motivated camera movement to show energy.
24: Wide roll away. – Overview that shows that the threat is still hidden.
25: Ots shot from behind traveler end of roll follow to stand and turn. – Interesting camera movement and framing should interest audience and set up the scene.
26: Second fireball pov wide races towards traveler. – Filler Shows fire effects
27: Camera on traveler, right in front spinning stick. – Effects with collision and flowing stick movement.
28: Camera behind spinning stick. – Collision effects from a different angle
29: Med wide shot of traveler using stick to return there own firebolt via a under spin. – Flowing movement
30: Low angle wide shot of the dunes with an fiery impact before sand creature leaps up pan down following decent. – Angles exaggerate movement to make it less human.
31: The same wide tilt without sand creature but a hole in the sand at the landing sight this then follows the coke bottle running along under the sand. – Makes it look as though the creature is traveling beneath the sands (requires a large setup time)
32: Follows bottle from side close up. – Makes it seem to travel for a larger distance
33: Follow bottle from behind close. – Can show travelers reaction.
34: Med shot traveler scanning the ground stick braced. – Suspense build
35: Side shot sand creature rising out of leap out of ground grabbing stick whilst doing so. – Jump scare to shatter tension.
36: Shot from back of sand creature which rises into shot showing travelers surprise. – Jump scare different angle.
37: Overhead shot stick wrestle. – shows full event but keeps the audience at a spectators view.
38: Med wide stick wrestle. – Puts the audience in the fight.
39: High angle front med close traveler stick wrestle. – makes traveler seem vulnerable
40: Low angle front sand creature stick wrestle. – Makes sand creature seem dominant.
41: From behind traveler med wide traveler thrown back loosing the staff. – More vulnerability means higher risk of loosing the stakes which engages the audience more, also loss of the barrier *see research.
42: Med high angle traveler thrown back loosing staff. – High angle emphasizes vulnerability still.
43: Close low angle fire hammer fist sand creature. – Shows aggression.
44: Med shot high angle traveler dives to the side as fist hits sand follows up with a fire stream. – Close call to engage audience.
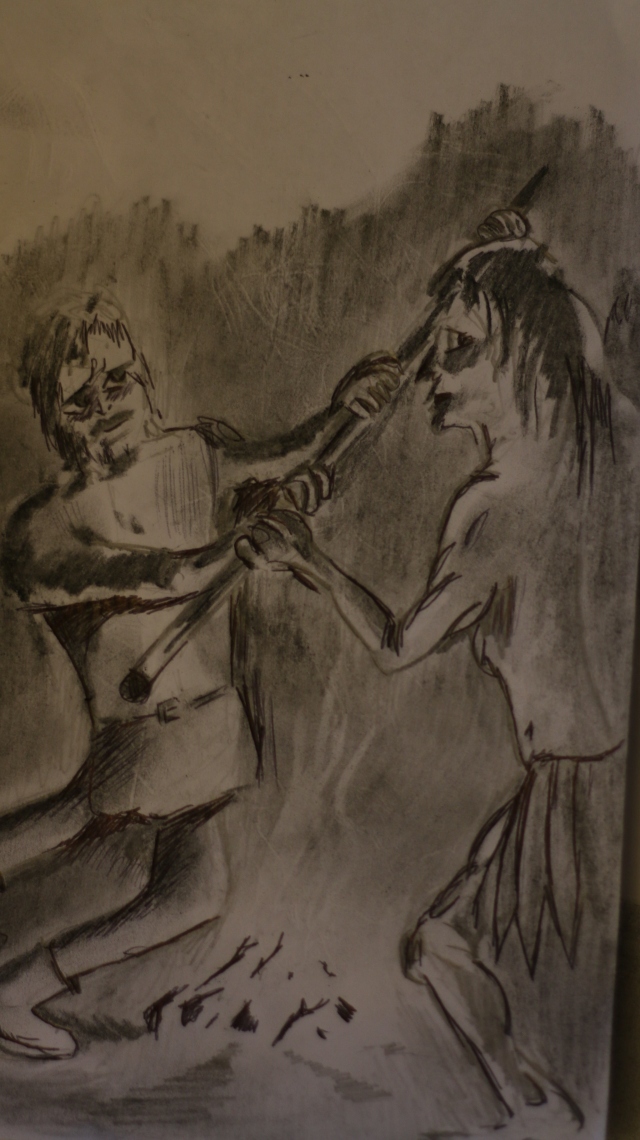
45: Traveler stumbles behind the camp fire, wide sand creature on the other side. – Circling and barrier *see research.
46: Side close shot amulet un tucking from travelers vest – Shows that the amulet is still important
47: Close of sand creatures eyes slight camera movement sideways. – Uses elements of a western for tension.
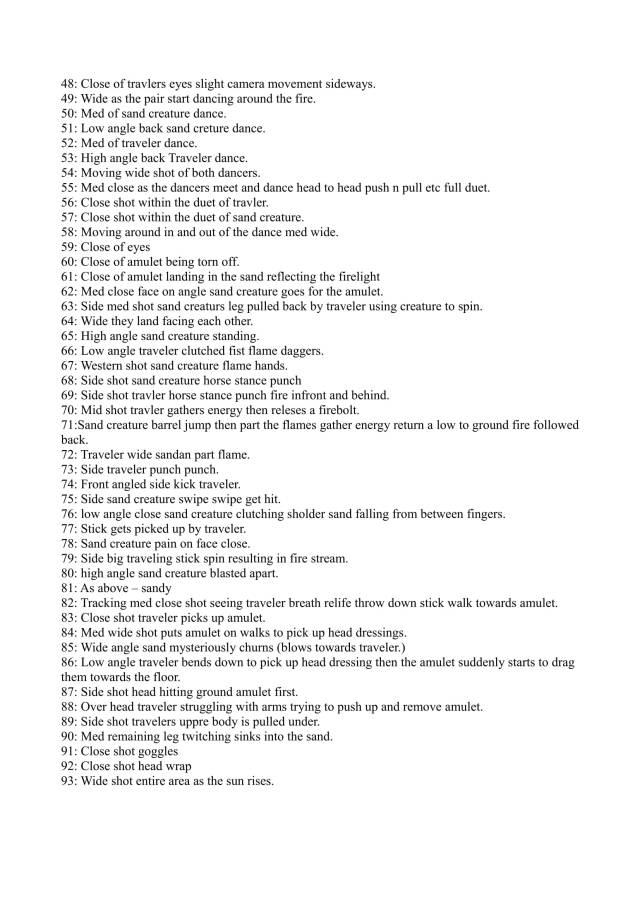
48: Close of travelers eyes slight camera movement sideways. – Uses elements of a western for tension.
49: Wide as the pair start dancing around the fire. – Establishes the second level of conflict.
50: Med of sand creature dance. – Demonstrate flow of fire power.
51: Low angle back sand creature dance. – Shows dominance of the element.
52: Med of traveler dance. – Shows that they too can control the fire.
53: High angle back Traveler dance. – Shows that they still don’t have the upper hand
54: Moving wide shot of both dancers. – Shows circling and barrier which with push and pull camera movement shows the conflict *again see research.
55: Med close as the dancers meet and dance head to head push n pull etc full duet. – Puts the audience within the dance.
56: Close shot within the duet of traveler. – Puts the traveler at neutral power.
57: Close shot within the duet of sand creature. – Same as traveler to show that they are equals now.
58: Moving around in and out of the dance med wide. – Push and pull communicates conflict.
59: Close of eyes – Intimacy with character
60: Close of amulet being torn off. – Peak of action as the object they are fighting over is now in neutral territory.
61: Close of amulet landing in the sand reflecting the firelight – Break in the action as the cause of the conflict’s circumstances have changed.
62: Med close face on an angle sand creature goes for the amulet. – Changes the direction of movement and conflict.
63: Side med shot sand creatures leg pulled back by traveler using creature to spin. – Traveler takes upper hand.
64: Wide they land facing each other. – Western style intro to the final battle.
65: High angle sand creature standing. – Tables have turned and the sand creature being distracted means that it is now the vulnerable one.
66: Low angle traveler clutched fist flame daggers. – Western gun in holt fingers twitching effect.
67: Western shot sand creature flame hands. – Western gun in holt fingers twitching effect.
68: Side shot sand creature horse stance punch – First to aggress showing desperation.
69: Side shot traveler horse stance punch fire in front and behind. – Reaction
70: Mid shot traveler gathers energy then releases a firebolt. – Raises threat for sand creature.
71: Sand creature barrel jump then part the flames gather energy return a low to ground fire followed back. – Shows skill over fire.
72: Traveler wide sandan part flame. – Traveler demonstrating that they can match the creatures ability’s.
73: Side traveler punch, punch. – Attacks rate increase.
74: Front angled side kick traveler. – powerful attack to show they intend to end the fight.
75: Side sand creature swipe, swipe get hit. – The downfall
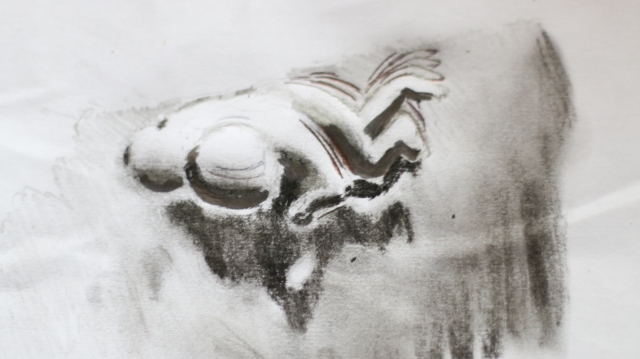
76: low angle close sand creature clutching shoulder sand falling from between fingers. – Helplessness
77: Stick gets picked up by traveler. – Close and calm showing there victory is definite.
78: Sand creature pain on face close. – Engages with audience… sympathy?
79: Side big traveling stick spin resulting in fire stream. – Killer strike showing anger.
80: high angle sand creature blasted apart. – Death
81: As above only just sand – For the effect of disintegration.
82: Tracking med close shot seeing traveler breath relief throw down stick walk towards amulet. – Total resolution relieving all tension.
83: Close shot traveler picks up amulet. – Shows the prize.
84: Med wide shot puts amulet on walks to pick up head dressings. – Calm moments
85: Wide angle sand mysteriously churns (blows towards traveler.) – Tells the audience this may not be over.
86: Low angle traveler bends down to pick up head dressing then the amulet suddenly starts to drag them towards the floor. – Jump scare two
87: Side shot head hitting ground amulet first. – Entrapment
88: Over head traveler struggling with arms trying to push up and remove amulet. – Shows vulnerability.
89: Side shot travelers upper body is pulled under. – false perspective / keying
90: Med remaining leg twitching sinks into the sand. – End
91: Close shot goggles – Shows remnants.
92: Close shot head wrap – Shows remnants.
93: Wide shot entire area as the sun rises. – End
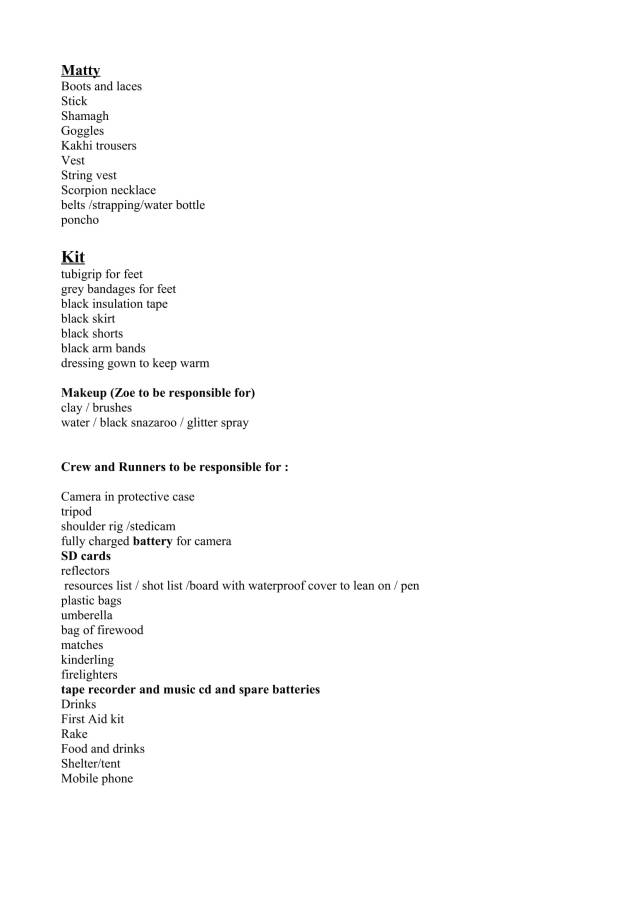
Resources List
Location Scouting
North Walney nature reserve:

Pros:
- Very few people mean that there is less chance of people just walking into shot. Which was in issue with my fmp last year.
- Has plenty of sand dunes which I can pass as a desert landscape.
- It is near to my house so doesn’t require a long car trip.
Cons:
- Long walk to be carting equipment along with us.
- Hard for people to find.
- Wildlife could pose a problem as the are lots of highland cattle and sheep.
Roanhead sandscale haws:

Pros:
- Plenty of sand dunes that again would pull off the desert look.
- Very close to home.
- 2 minutes from the car park and facility so equipment logistics are not going to be an issue.
Cons:
- Popular area with dog walkers and family’s so there may be intrusions.

Wooooaaaaaahhhhhh Kit! Is that you?
I was concerned about the CGI fire, but it’s incredible. And the make up and costume is brilliant. So excited to see this film.
LikeLike
I really want you to bring some of these tests in to your development post and discuss them, what works and what doesn’t. This is great work Kit, though you need to start filling that development post with content.
LikeLike
Feedback as of 03/06/17
Kit, you have written a good project proposal that clearly indicates your ideas. It does however need to be formatted on your blog as it isn’t completely clear which is the final draft. It is also critical that you add the schedule and bibliography in to this as soon as you get a chance.
The ideas development stage is good and shows a variety of different concepts although it isn’t obvious how you came upon the idea you have chosen and it would be good to see some more thorough analysis of the pros and cons of the stronger ideas.
Some of the research and analysis of research coming through is fantastic Kit, there just isn’t enough of it! As we both know you have had your hands full with a very post production heavy project but it would be great to see more of this targeted research up on your blog I the next week. Again there are some excellent tests but we need want to read your analysis of these and see how they have affected the sequences in the final film.
I suspect you have too much post-production ongoing to fully attend to your blog. Hopefully you can get to this within the next week or so. The capacity to hit distinction level with many of these posts is there but you must add the things listed above to hit this.
Very much looking forward to seeing your rough cut on the 7th June as discussed Kit.
Micro Targets
Formatting of project proposal and schedule and bibliography added
Proper analysis of test indicating the changes brought about in production
Boost research posts with at least three more examples
LikeLike