
Developing My Narrative:
What is a story:
A story is a journey between beginning middle and end (in any order.) We tell stories because as a mortal creature we like to share our experiences and the things we have heard. We like to immortalize our reactions or to teach others about things and explain what we may not understand. Doing this helps us think we have created something that will outlast our lives whilst still provoking the same responses as they did originally. Stories help us to develop connections with people and gain a sense of validation in our ideas.
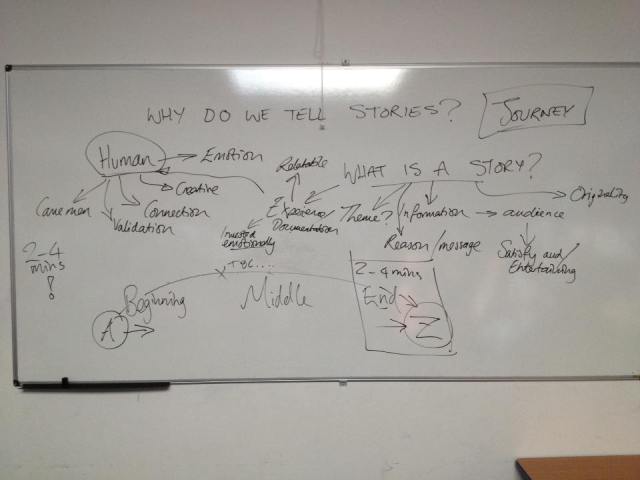
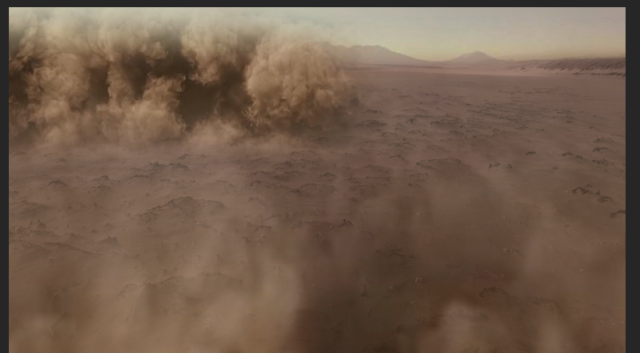
From Syd Field’s model I knew that I wanted the beginning of my story to be approximately 1 quarter up to 1 third of the length of my film and that I wanted my beginning section to be where I set up the location, context and introduce my main character. I knew that I wanted a hook point at the end of my set up that leads to the conflict. With these thoughts I decided to have opening shots establishing that showed the main character was travelling through a treacherous desert with flowing sands and undulating dunes on a lone and exhausting journey with a precious amulet. At the end of this set up, I then decided to add my first plot point and to alter the direction of the action by having the sand creature attacking him. This then leads to the middle section of the film which I want to be approximately half the length of film in its duration. In this section I will have the conflict. The traveller and sand creature will fight over the amulet and this conflict will build up to a crescendo towards the end of the middle section. I will have my second plot point at the end of the middle section where the traveller gets the better of the sand creature. In the end section of my film as Syd Field advises I will then have the conflict being resolved with the death scene of the sand creature and then the desert seeking its revenge on the traveller by whipping up a sand storm. This will bring the narrative around full circle and I will end where my story began. In doing so hopefully my narrative will have a flow of its own.
Developing My Visual Narrative:
From my research I have decided to show rather than tell my story. I will use a variety of shots in order to do this. I will have extreme wide shots establishing the location and placing the traveller in the dunes. I will switch to close ups and then back to wide shots for a cinematic look, contrast and to move the narrative onward by showing the travellers emotions. I will use double shots when the conflict begins and change to single separate shots to show opposition and aggression. I will use low angle shots to show dominance and strength and high angles shots to show weakness particularly during my death scene. I will ask my crew to use a shoulder rig or steadicam to manually track the action and in doing so will have some circling and tilted shots to add to the confusion of the conflict and to add dynamism. I will have an over the shoulder shot, wide shot, when the sand creature spies on the traveller in the dunes to give their point of view and a sense of distance. I will add music/ Foley that doesn’t detract from the visual narrative but that complements it and will edit so that the visuals are given priority and the soundtracks take a secondary role whilst remaining a high priority.
With these ideas in mind I produced an extensive shot list for my crew, I then story-boarded my ideas with my dad who is a very fast and talented artist. Please see my shot lists, story board and a detailed justification of why I chose the shots I did under the planning section of this blog.
Casting my Dancer
In my first year FMP I used my sister Zoe as my actress; in my film ‘Tenebrosity’ I used my parents as my actors; I have since, worked with Performing Arts Students in my film ‘Facade’. This time, I was determined to work with someone from outside my circle of family and friends and in doing so to work on my skills as a director. I know have to get used to communicate with new contacts and to learn from doing so.
From having attended dance classes at the Brewery Arts Centre for 15 months I knew of a dancer called Mattie Margison who is very committed to getting as much experience as possible as a performer as he is looking to study physical performance at University and make a career for himself in the dance world. I approached Mattie at one of the dance classes to see if he would be interested in taking part and to my delight he was flattered to have been asked and happy to be involved. It really was as simple as that. We swapped phone numbers and added each other to our Facebook Friends and I promised to get in touch with him to arrange times to meet and discuss my project, choreograph and rehearse.
Later on in my project, I did cast my sister Zoe as an understudy for Mattie (see more on this below).
Selecting My Crew
There is very little to document here other than I had agreed to help Matthew Tucker out with his FMP and he had agreed to operate the C100 camera, to use a tripod and a shoulder rig to film my project. We had worked well together in our last film project ‘Facade’ and I find him to be very professional in his approach, positive and a lovely guy. Matthew who likes to be called ‘Tucker’ never moans, he just gets on with the job and he was happy for me to direct him and discuss all the shots before hand and afterwards.
For my second day of shooting, Tucker was not available and neither was the C100 camera. Luckily, my good friend, Ash Podda was available for the evening and I managed to get the FS700 booked out and a tripod and shoulder rig again.
Sand Creature Development and Testing:
Makeup
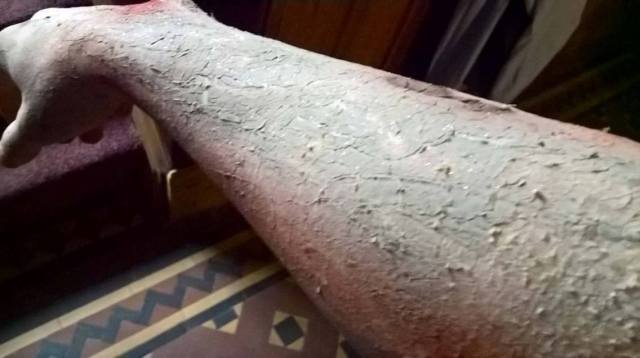
One of the first tests I did for creating the sand creature was to try actually applying sand to my skin by having a small layer of Vaseline as a base and then coating it with sand… ..


This was very effective at making my skin look as if it was made of sand. It was quick to do and easy to wash off, however, my skin did feel sore and irritated afterwards. I was also concerned that I might blend in too well with the environment. This is an issue I have come across previously ( an actor wearing a dark blue jumper in a dark room in my ‘Tenebrosity’ film created problems for me ) and it would mean rotoscoping later would be near impossible for me. Moreover, the character would be too camouflaged to come across as a threat or as a main point of focus for my audience. I am happy to have learned from my test shots and from past mistakes on this occasion before having filmed and for the sake of my own skin will reject this, easy to do option.
Next, I considered using a CG, cracked texture as I had in my last film Facade. (Please see my research post on this). However, I remembered how photoshopping each frame was very time consuming and I was aware I would have a lot of other visual effects that I would have to spend time on, so for efficiency reasons I decided to try a more practical approach on this occasion. For ideas, I started browsing Youtube for makeup tutorials. One in particular was very inspiring (see my research for this) and pointed me to using Calcium Bentonite or Fullers Earth to apply a mask to the skin that once it dries cracks to create a sort of salt plane cracked earth effect. On checking Ebay I found that this Calcium Bentonite was readily available to be delivered to my home address in time for filming and to my delight was very inexpensive and was considered a product that is actually good for the skin rather than damaging. When the product arrived I enlisted my sister Zoe and my mother into doing some test applications. We tested it on my arm, finding that a thin layer did not quite give a strong enough effect for the camera.
We then tried a thicker layer and this generated a really good effect similar to the desired effect I had seen in the youtube video. The process of applying the Fullers Earth was quick but it did take some time to dry and left me feeling very cold. To overcome this my family used a hair dryer to speed things up. This greatly helped, so the next time it was applied, I not only borrowed two hair dryers but also a warm fan heater to help the process and keep me warm and comfortable throughout.
Further experiments with makeup led to me trying a multi layered approach. I used red body spray to highlight my tendons and veins and once the Fullers Earth had dried we applied a body glitter spray which created highlights that enhanced the cracking texture.
I liked this effect as although it was very subtle it did further take away from the humanity aspect of the creature and made me look a little more reptilian. The glitter spray also had the added benefit of helping the Fullers Earth to fix in place during movement.
I was also inspired greatly by Ballet Rambert’s production ‘Ghosts’
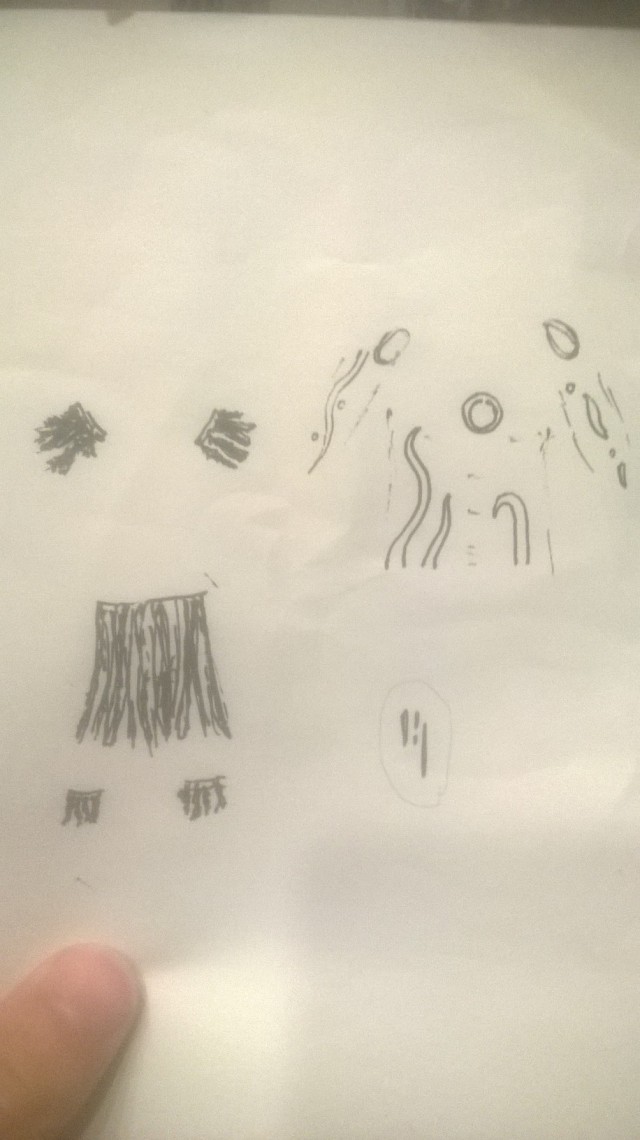
In this as you can see the Ghost dancers have tribal markings on their bodies that follow their main muscles and skeleton, helping define their movements. The Ghosts wear masks and tribal skirts and arm bands. I love the impact of these so decided to apply elements of it to the sand creature (please see my section on Costume development, for more on this). I hence, invested in some black stage makeup and designed some markings and tattoos to add to the creature design (please see my drawing of tattoo markings in costume development below).
Sand Creature Development:
Costume
When I summarised, my learning from having carried out secondary research on costume design (please see my research section); I came up with a spider diagram to depict my main points. Keeping this summary in mind I knew that I wanted the Sand creature’s costume to show the following :-
- that the sand creature was of the desert, sand like with earthy colours and tones
- that it was not of this world
- that it was not of any particular historical period
- that is was a major, antagonist in the story
- that it was not a creature of wealth or poverty
- that it was ageless
- that it was animal like
From my research I again knew that it was important to ensure that the costume fitted the performer, which in this case was to be myself. That it was important that it was comfortable to dance in, cheap to make, durable to dance in for at least 3 occasions in the windy /sand dunes and that it needed to reflect or add to the brief and visual narrative.
With all this in mind I thought about having the sand creature looking like a person made entirely of sand, like the characters from the short film ‘Sandcastle –
I liked this, as it takes the audience into the realms of fantasy. To try and replicate this idea, I considered having the dancer in a full bodied, sand coloured morph suit/ leotard or alternatively having them in black or nude coloured dancer’s shorts and relying on makeup to cover the exposed skin with sand texture (see above discussions on makeup). I researched various dance wear websites for appropriate leotards and underwear and it was definitely possible as a costume, as they are readily available to buy. The unitard below is available for £17.99 and the shorts are around £20.


However, there was nothing flowing or warrior like to these costume ideas, overall feel. I hence, looked at google images for further inspiration, creating a mood board based on other peoples ideas of sand wraiths / desert creatures 
This lead me to explore making the costume have more of a tribal feel. Having already come across Ballet Rambert’s ‘Ghosts’ when researching makeup ideas, I remembered how the costumes of the Ghost characters not only have an unearthly creature like aspect about them but they have a tribal look and must be quite a practical option if a professional ballet company use them:
Moreover, I felt they were more in tune with the many of the pictures I had found of Sand Wraiths on google (see above). I particularly like the way that the tassels on the Ghosts skirts and arm bands moved in a way as to emphasise and extend the flowing movements of the dancers. This aspect of the costume felt right for my film as it not only would it match the audiences expectations of a more tribal, sand creature but would better fit the project brief stimuli of flow. This costume choice would also allow me to use the black stage makeup and tattoo ideas for makeup (as discussed above) to good effect.
I discussed my three different ideas with my family and friends and everyone reinforced my feelings that something along the lines of the Ghost dancers was more exciting, more visually appealing and right for my film.
I sketched my final design for the sand creature’s costume to help convey my ideas to my mother and sister who had agreed to help me make the costumes and had given me a small budget of £50 for the whole film. On the left of this drawing is a picture of my ideas for the arm bands, the skirt and leg bands. Some ideas for tattoos and tribal markings can be seen on the right:
With this in mind we set about raiding the sewing box and rag bag at home to try and come up with something that matched the drawing. We began using some thick black elastic, black ribbons and feathers to make some arm bands. The feathers proved to be a nightmare to attach to the arm bands and kept falling off with movement which led to my scrapping the idea of using them as an option despite having really liked how they looked. We then just made the arm bands out of strips of black ribbons and to keep the cost low we cut up some old black jeans to create half of the strips. Using the old faded black jeans brought the advantage of giving the costume a more aged and weathered look. This then led on to making a skirt out of a similar pair of old black jeans so all the materials matched. My mother used the waist band of the jeans as the waist band of the skirt and cut the legs into strips. She then added strips of black ribbon to give the skirt another layer. All of this took only a couple of hours one rainy afternoon, so was very time efficient. To match the skirt and arm bands I decided the creature should have faded black denim bandages on his feet, held in place with black ribbons crisscrossed so as to look like leather, thong, gladiator sandals.
With my costume and makeup decisions made I then did some further final test shots, on location in full costume and makeup with the equipment I was going to use. ….


I felt really happy with the creature’s look in the test shots and decided this was the final impression I needed for my film. I was not over camouflaged and could easily be followed by my audience and this choice of method would greatly help with my time management as it would help reduce the CG requirements for the creature whilst still looking sand like/reptilian. My family and friends agreed that my sand creature’s look was now complete.
Traveller Costume Development
Again keeping in mind the spider diagram I had drawn to summarise my learning from having carried out secondary research on costume design; I knew that I wanted my costume for the traveller to show the following :
- that he is a young man of approximately 20 years
- that he lives in a desert part of the world where it is hot during the day but cold at night
- that he is from no set historical period
- that he is a major character and a weary traveller
- that he is not particularly wealthy but not impoverished either
- that his clothes will be dusty from the desert and worn looking
- that he travels, eats, sleeps and fights in his clothes
Also I knew that it would be important to have a costume that was reasonably inexpensive, that fitted my performer and was comfortable for him to dance in and that he looked good in. I was aware, the costume needed to be worn on two or three occasions and needed to withstand some rough and tumble. I particularly wanted the costume to suit the brief stimuli and to add to my visual narrative.
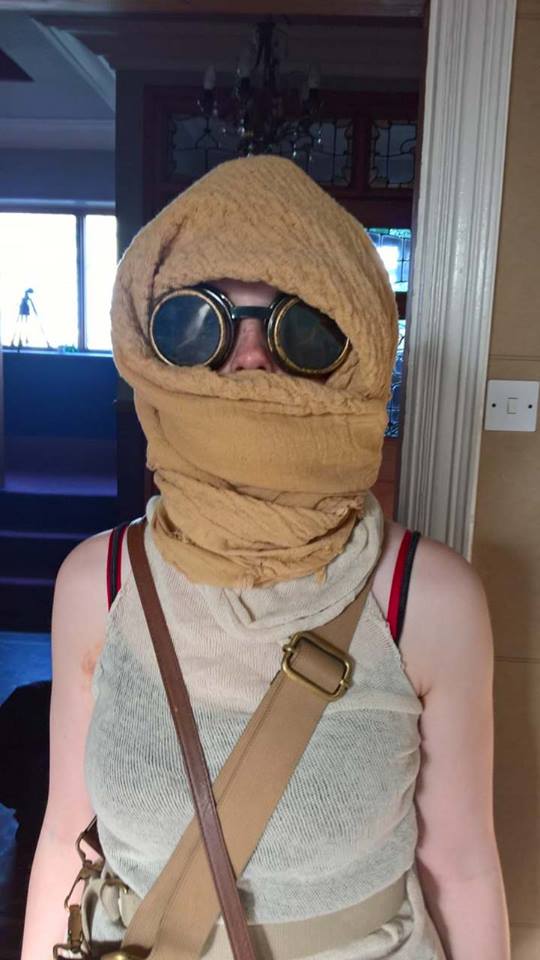
In addition to the above considerations, I felt that as the character is travelling in a desert with blowing sands and glaring sunshine, that he would naturally be wearing head and eye protection. Similarly, that as he lives in a climate that can vary greatly in temperature that he would also be wearing layers and not wanting to be conspicuous on his journey I felt that he would probably be wearing clothes that blended in well with the environment. It occurred to me that his clothes would probably be sun bleached and slightly saturated in colour. That because they are on a long journey in difficult terrain that they would have stout shoes on that would be scuffed and worn. That they would need a water carrier for easy access to hydration. Also to assist them walking in the soft sand and aid with balance and self defence that they would probably have a staff. Thinking about all these ideas I remembered the sandbenders costumers in Avatar and I also searched google images for some desert traveller images for inspiration :
- Sandbender Avatar


3) Google images : Desert Traveller

4) Google images : Desert Traveller

5) Google images : Desert Fighters

I discussed these images with my family, friends and Mattie my dancer. Images 1 and 2 came out as the most popular idea with everybody. The feedback was that they both looked mysterious and clearly, reflected a desert traveller. It was also felt that image 2 in particular had an element of flow about it. It was felt that images 3 and 4 were nice and flowing and definitely looked like they were of a desert traveller however, that both of these costume ideas would be difficult to dance in.
Image 5 was met with laughter from my family and hence, was rejected as not a serious contender. My father straight away put me off the idea when he suggested they looked more like overgrown boy scouts than desert travellers!
With image 1 and 2 for inspiration, I then sketched my final idea out :-
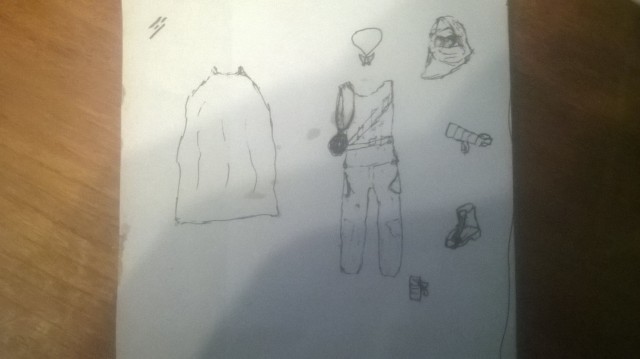
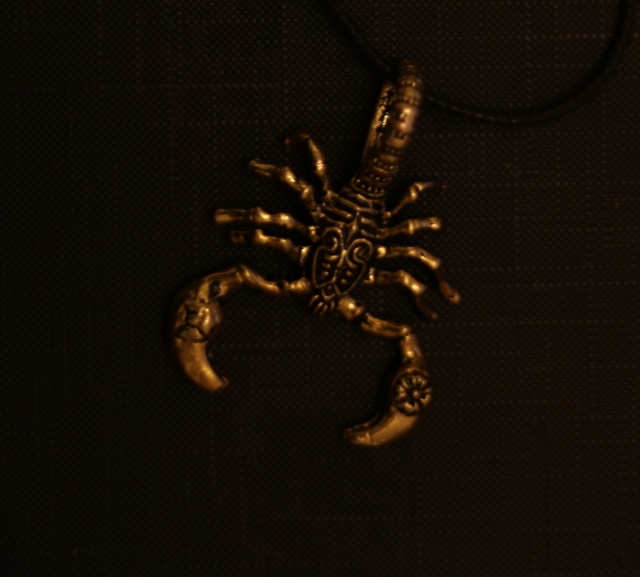
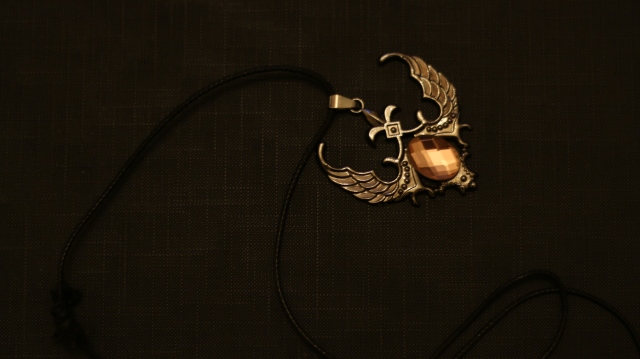
I raided my own dressing up box and realised I already had a Shemagh and some dark goggles that suited the costume plans and I then set about scouring the local charity shops for boots, belts etc. I still had plenty of money left in my budget so I bought a beige car wash blanket that I turned into a net over vest to go with the layering effect. I bought an old leather bag and hip flask that I asked my sister to age and scuff and make into a water carrier. I bought a webbing type belt and leather belts for 50p from charity shops and a cheap but new khaki vest and beige trousers off Ebay as these needed to be clean and of the right size for my dancer Mattie. I bought some scuffed old boots off Ebay again to fit my dancers size and these were suitably stout and lined with fleece to keep him comfortable. I cadged an old curtain pole off my gran which I sanded and stained with gravy browning to look aged and gave to my sister to add bindings and thongs to stylise to suit the traveller and to extend the flowing movements when he uses the staff. On reflection it was perhaps a foolish idea to use gravy browning to a stick that is to be used in a popular dog walking area! For a shawl my mother gave me and old black woollen blanket and my sister presented me with a brown patterned poncho but I didn’t think these matched the drawing and didn’t add anything to the costume. My gran however, had a sand coloured poncho that had tassels on the end which I felt would blow in the wind further linking to flow. Luckily, I managed to pursued her to let me borrow this and she loves to tell her towns women’s guild friends how her clothes have been used by a travelling warrior in my film. Finally, I bought a couple of necklaces from a market stall in Manchester that I felt would be suitable to represent an amulet in the film……
As this project progressed we did a dress rehearsal in full costume and Mattie’s feedback was that he loved the costume . He found it was comfortable and easy to move in which was very important for creating a flow of movement and getting the best out of him as an actor/ dancer which for me as a director is vital. It did occur to me at this point that the shawl in particular may cause issues for rotoscoping later however, I felt it worked so well and fitted Mattie so perfectly that it would be worth the extra time I would have to put in post. It became clear during the test shots that Mattie quite naturally wanted to spin and slam the staff down on the ground which inspired our choreography as it become a great focal point for the combat scene and I was excited about the potential to utilise this in creating more dynamic fire CG when post producing the film. I loved the aesthetic appeal of the travellers costume as not only did it represent the traveller well but felt it would add an extra dimension of interest for my audience. I was aware that overall it could be considered a little cliched and stereotyped however, as post modernist theorists would perhaps state here, everything has probably already been done before and sometimes cliches are as such for a reason.
I must note at this point that I had come across some difficulty in arranging times to meet up with Mattie who works full time and lives an hours drive away from me. Indeed, on one occasion where I had booked a rehearsal room at the Brewery Arts Centre in Kendal at a time and place more convenient for Mattie, that he slept in. This turned out to be a one off, but it did leave me feeling quite apprehensive about using Mattie and having to coordinate booking the equipment out, arranging crew to be available and doing this to coincide with good weather. I hence, decided a back up plan was needed and so enlisted my sister Zoe as his understudy as she is also a trained dancer and martial artist and is extremely willing, reliable and fun to work with. This meant of course that I had to have a backup costume available for Zoe to use and this can be seen below. Zoe had already got a suitable vest, khaki trousers and some old boots available and could also utilise the other items of Mattie’s costume to give the same effect……
One of the key aspects of the costume to me was the Amulet as it is so important to driving the narrative of the film. During our test shots we realised that the Scorpion Amulet better suited the location, and theme of a desert than the other amulet and was more in keeping with the travellers costume.


Choreography Development
From my primary and secondary research on how to do devise a dance I produced another of my spider diagrams summarising the main points to consider when choreographing.
Keeping this in mind I knew from the outset that the project would benefit from having a preliminary meeting with my dancer, Mattie to discuss his experience of dance, martial arts experience, his availability, what my fmp is about, and what I hope to achieve with the dance etc.
Mattie agreed I could meet him at the coffee shop where he works so we could have a chat.
Preliminary Meeting with my Dancer
Over coffee I found out that Mattie has over 5 years experience of dance and that he attends Ludus Dance School to study contemporary ballet and physical performance as well as attending the youth dance classes at The Brewery Arts Centre in Kendal. I already knew he was a great dancer with ambitions to attend University to do a Foundation Degree in physical performance but I hadn’t realised we would be quite so unequally matched skills wise. I have only been attending dance classes for 15 months and hence, have only minimal experience! With this skills mismatch in mind I asked him to be the lead dancer and as to whether he could use any of his previous learning to help us come up with a dance. He agreed to this and reassured me that he loves to improvise and works best if asked to come up with something to music on the spot.
I explained my visual narrative to Mattie, the cause of the escalating conflict and how I saw the characters. Mattie told me that he also has some mixed martial arts training and we agreed we could use some of our fighting experience in the dance as a good starting point. I then explained about the brief stimulus of ‘flow’ and how I wanted to reflect this in my sand dune location and with flowing moves in the conflict that I would enhance with cg fire. I advised that our audience would be made up of my peers, tutors, examiners, friends and family and that I would also be adding the film to my show reel to show potential employers what I can do and that I may decide to enter it into Festivals at some point. Mattie was fine with all this and gave his permission for me to show the film to anyone and to use it anyway I wanted. I got his clothes sizes off him and shoes size so I could make sure he had a costume that fitted. We then agreed to meet up at the Brewery Arts Centre the following week to improvise some moves.
I contacted the head of dance at the Brewery Arts Centre and booked a room to rehearse. The following week however, Mattie slept in (as already discussed above). As Mattie works full time and has lots of other commitments we agreed he would work on a solo sequence for himself and I would work on a smaller solo for myself. We then agreed to meet up the following week for a long day in Barrow. We decided we would fit his costume first thing in the morning and would watch some video’s for inspiration and then would go to the location I had chosen and rehearse for a couple of hours. We would then have lunch back at my house and return at 2pm to the location to meet up with my camera operator Matthew Tucker and to film as much as possible.
This all happened the following week as planned. The weather was as forecast and Mattie drove to my house where we relaxed and discussed the different words Alleyna Woodend (please see my primary research on her contribution) had jotted down for me for inspiration and then watched youtube videos for further inspiration. I showed him a firebattle scene from Avatar that I like the poses in and explained if we could adopt some poses that this would help me add vfx at a later date.
There are hundreds of dance videos you can use for inspiration on youtube but the following video I found particularly relevant for the head to head flowing arms movement. Mattie could see what I meant when we watched this and we agreed to try something similar ourselves:
We then set off to the location and after a warm up session (and after my dad had thoroughly raked the sand to get rid of as many sharps and stones as possible) we had a go at improvising in full costumes to some music that had a good background beat. It was clear that the sand really absorbed a lot of the energy from our moves and we decided to adapt our moves so we didn’t have to travel up and down the dunes so much. We also decided it would be better for Mattie if his character took off the water bottle prop at some point before our fight sequence as it kept bashing him. Mattie showed me the solo sequence he had been working on and it was definitely the sort of thing I was after. It was clear that he would also have to put the staff down before this sequence though and we would have to have the character picking it up again later as I wanted him to use it in my death scene. Mattie, watched my solo sequence and as he thinks so well on the spot, he managed to adapt his solo a little, so our styles matched more. We practised a head to head sequence as in the above video and some mirroring of his improvised moves in stances that were opposite one another to show aggression and conflict. Mattie practised twirling and smacking the travellers staff on the ground. We then headed back to mine for lunch to return refreshed and rested an hour later to meet up with my crew as planned.
The Shoot
A week before my first day of shooting, I went through my to do list and confirmed the equipment was booked and would be available for me. I checked the weather forecast to make sure it was going to be suitable to film and updated/sent out my call sheet for day 1. I then went through my resources list to make sure everything would be available/bought for the following week.
The day before my shoot I went through my action plan of things to do the day before a shoot (please see under planning for exactly what this involved).
On the day of the shoot as mentioned above I met up with my dancer for the morning to work on our choreography. After lunch we met up with Matthew Tucker my camera operator and the rest of my crew of runners (made up of my parents and sister) promptly on set as agreed. I quickly organised my parents into putting up the tent and sorting out where to put the resources such as food, drinks and first aid kit etc and I asked Mattie to warm up again and continue practising with the staff, so I could turn my attention to Tucker.
I set the shoulder rig up and camera with the settings I wanted as follows :-
ISO: 400
Aperture f-stop: 5
Fps: 25
Shutter Speed: 50
ND filter: 0, 2
Lens: C100 Zoom Kit Lens
I then went through my story board and shot list with Tucker describing the style and mood I was after. We then proceeded as follows:
I would go through the next shot with everyone, explaining to Mattie how the shot fitted in with the overall narrative and marking out where I wanted him to move. Tucker would then do a practise film for framing and composition and to get used to any dynamic moves, we would then look back at this and reshoot either one or two more times depending on how confident Tucker felt about having got it.
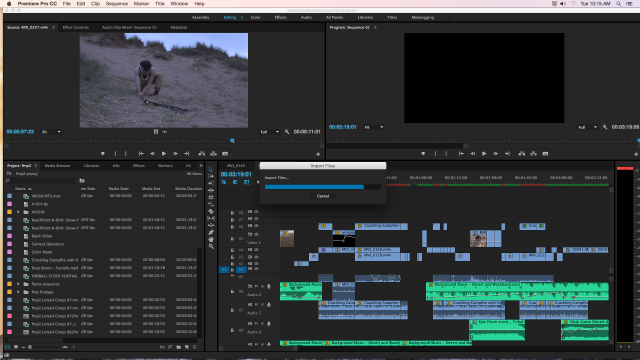
The shoot progressed very smoothly and we systematically worked our way through my shot list wracking up a total of over 230 takes. We stopped twice for short breaks to rest my dancer and warm up but everyone worked really hard and remained very focused, energised and positive. It was an excellent experience, despite the fact that we were still improvising our dance to some extent as we went along and despite the fact that I was acting as a director as well as performing. I did have to concentrate very hard and remain quite seriously throughout the day so I could keep up the switching from my role as a Director, to a choreographer and performer. It was of a massive help to me that I had planned for the day so thoroughly. I felt prepared and confident knowing I had thought about our health and safety and had checked all the resources and equipment. This allowed me to concentrate during the shoot and not to feel irritated or frustrated by any trivial matters. The only minor problems that arose during my shoot were from two unseen / unpredictable sources. Firstly, there was a couple of dogs that decided to join in and were greatly attracted to the gravy browned staff Mattie was using and these needed scaring off by my dad. Secondly, however, much my dad raked the sand, over the day more and more pebbles and sharps came to the surface.
At around 20.15 we stopped for the day, lit the fire and had a half hour chill to watch the sun come down and flames. We then all headed back to my house to watch the rushes over supper.
I was delighted with our achievements but in some of the scenes, the shelter tent could be clearly seen and some of our duet sequences were not up to standard…..particularly the ones in which I had attempted unsuccessfully to cartwheel over Mattie’s shoulders and the ones where I appeared to be enjoying myself far too much….grinning happily from ear to ear! I knew I would add some retakes of some of these scenes to my shot list for day 2 of the shoot.
We then discussed meeting up again for day 2 of the shoot and it was impossible to get Mattie and Tucker on the days with suitable weather conditions, due to their work commitments. I therefore thanked Tucker for his hard work and involvement so far in my project and got in touch with my good friend Ash Podda to see if he could attend on one of the evenings when the weather looked good. He could attend on the following Friday and agreed to pick Mattie up in Kendal, Day 2 of the shoot was hence, now booked.
The following day I updated my shot list for day 2 of the shoot, booked some equipment out with college and sent out the call sheets. I couldn’t get the C100 for day 2 of the shoot but managed to get the FS700 instead, this was no problem for me as I am comfortable at using both and happy to support my crew to do the same.
On day 2 of my shoot, I was thoroughly prepared and had all the resources laid out again. However, my poor camera op got stuck in traffic on the way to Kendal, which left my dancer waiting and confused in Kendal and myself quite apprehensive (in full costume and clay makeup) back in Barrow. Luckily, I used messenger and texting to up date my dancer as to where my crew was up to and he waited. When everyone did arrive at mine, they were tired and needed refreshments and some banter to cheer them up. We hence, headed to the location over an hour late. This was a set back but I knew exactly what I wanted from the shoot with all the prep I had done and how to work with each person from having worked with both before. My shot list was also considerable shorter on this occassion and Mattie knew the drill from having done day 1 with me. We then proceeded much the same as on day 1. I helped Ash set up the shoulder rig and camera with the same settings I had used for day 1 to maximise consistency. I would then explain what the next shot was to Mattie, how it fitted in with the overall narrative and we would then mark it out. Ash would then practice, framing and composing the shot and we would watch the first take back and then redo it either another once or twice depending on how confident Ash felt that he had got it.
We finished shooting around 20.30 then packed up and returned to my house for a chinese takeaway and to watch the rushes back. I was happy with the rushes and felt I had pretty much wrapped. I thanked my cast and crew for their contributions and promised to invite Mattie to the screening.


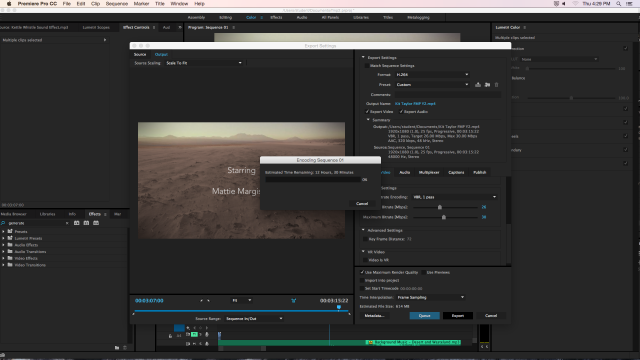
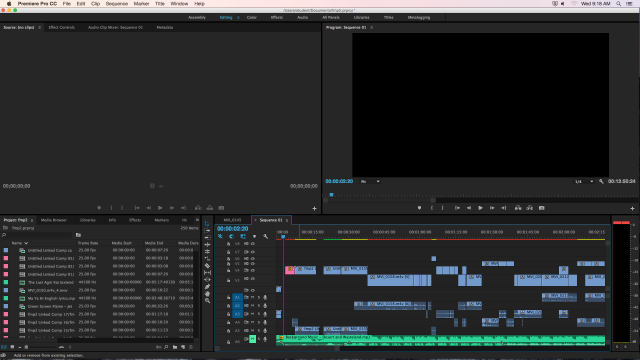
The Edit
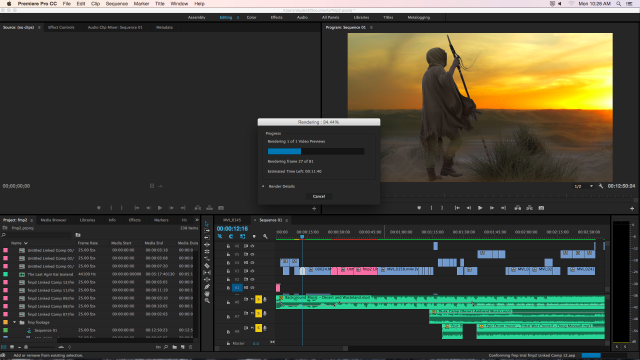
In the first rough cut of my edit with the footage collected from day one I was happy that the footage I had was telling my narrative exactly as I had proposed, however i also noticed that even without the rest of my shots my film was over 4 minutes (6 mins) which meant that it didn’t fit the brief and if this was a TV commercial or short film the producer would have a field day with me and it wouldn’t be accepted. After my second day of filming I gathered all the footage into another couple of rough edits, beginning to cut it down to size, however it was still slightly over the time by a few frames and so in order to match the brief and not loose my narrative I have adapted the narrative so that now instead of both my characters dyeing now only one would die. I also sacrificed the amulets importance greatly showing only its value to the traveler (in the shots where they carefully tuck it in and tuck it out). For the pacing I also had to make sacrifices to continuity for instance you may notice that the canteen that the traveler is carrying vanishes half way through. In truth the shot shows the traveler removing the sash but the fact is that the time this takes was damaging the flow of the film as it slowed it down to much during a combat scene.
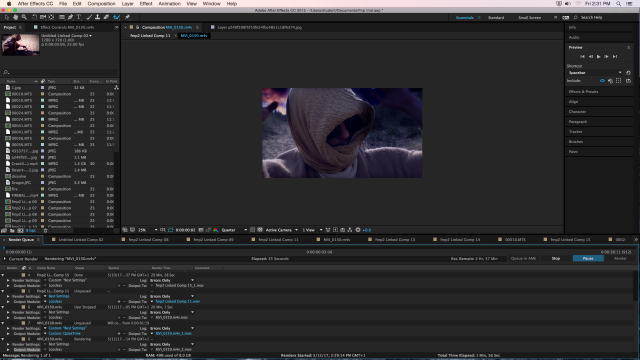
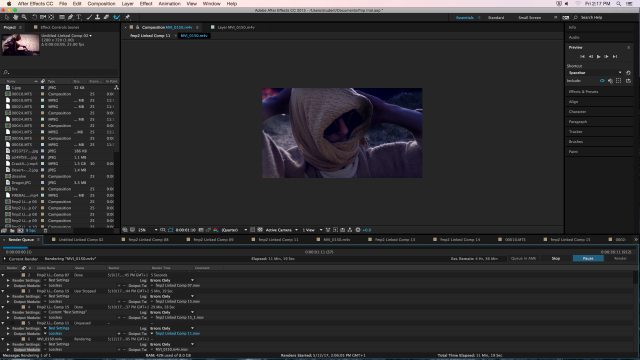
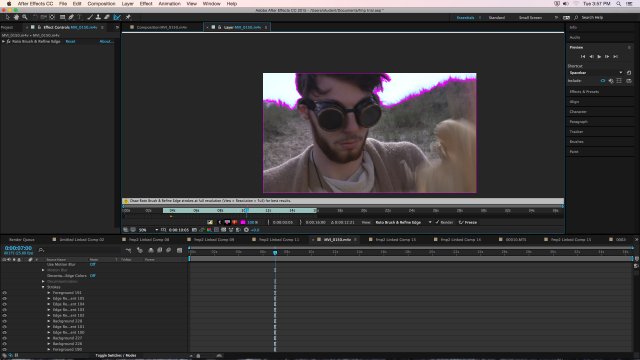
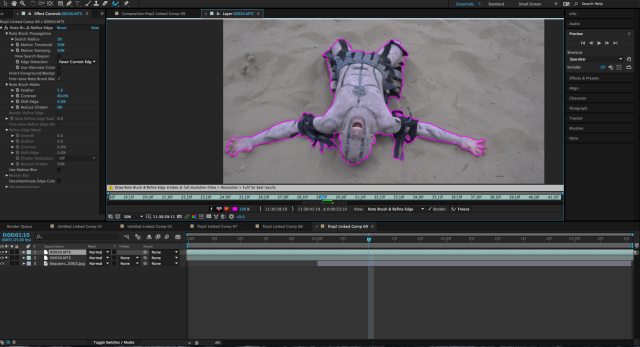
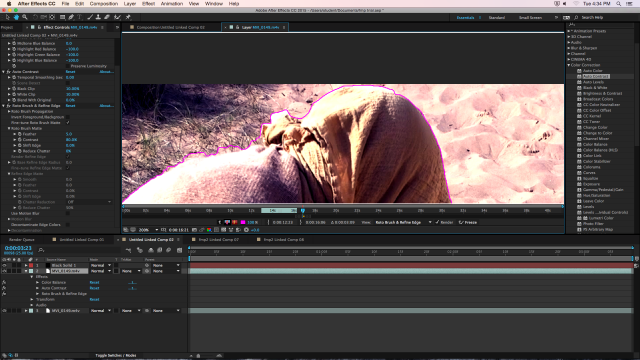
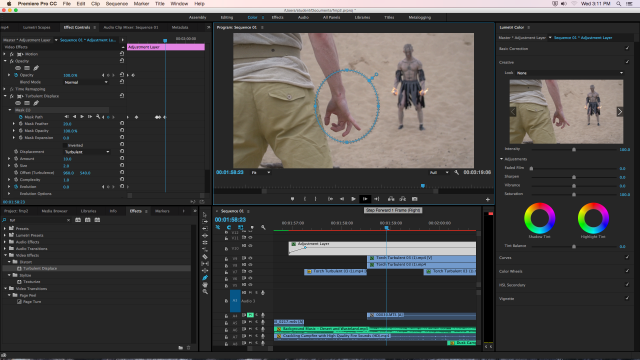
As mentioned in various places in this blog i spent an awful lot of time rotoscoping. To do this I would take my edited clip and open it in after effects using adobes dynamic link system (wonderful tool though not with out its limits). initially this was looking great and the aesthetic was very pleasing though as time went on I found that certain scenes just weren’t working as the rotobrush tool I had learnt to use was not able to locate the edges accurately as the colors were to simlar; a problem I had identified earlier on when designing the costume. In future if I were to go about this again I would use high contrast complimentary colors or just use a green screen as I have no issues with keying and they both follow the same principals of cutting at the colour difference. After three weeks of painfully rotoscoping I decided that enough was enough and that it wasn’t going anywhere. This was down heartening as it was 3/12 weeks wasted however it is also one of the best learning experiences I’ve had.
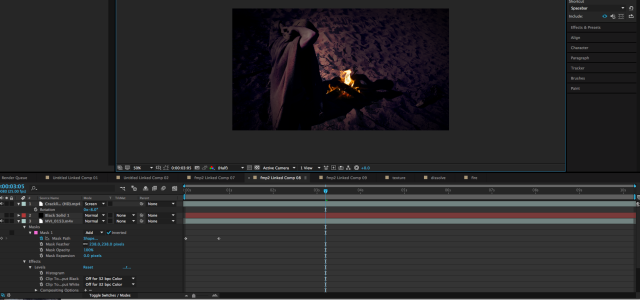
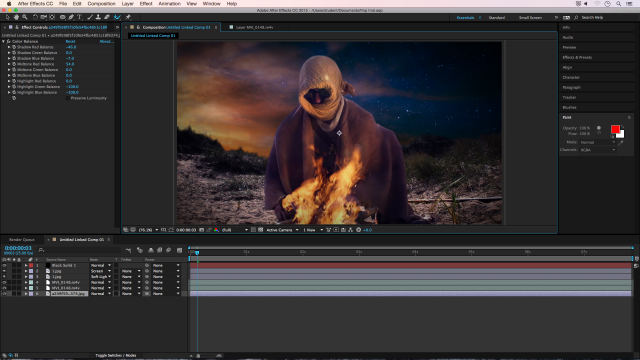
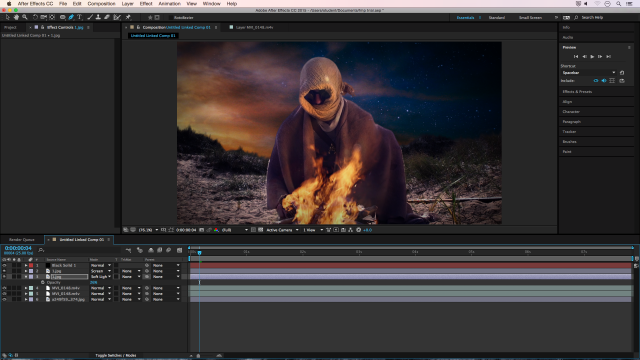
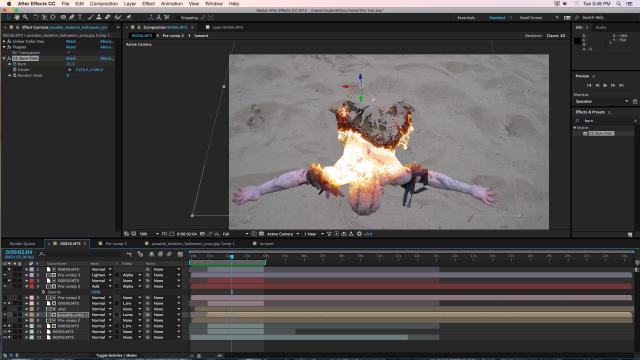
All the visuals that I edited were done so without music or sound as my research on Stanley Kubrick’s methods suggested. To do the sound for this film I had used a tape player on location with a regular beat so that I would be able to find a piece of music that would fit the dance quite easily later on. The music used was from ‘soundcloud’ and the sound effects were either Foley or royalty free sounds from YouTube. In total my final edit consisted of 23 layers (5 sound and 18 video) this meant that there were a lot of masks, alpha mattes and opacity / blend mode effects which I had controlled the dynamics of with the pen tool on the timeline. This was especially the case in my disintegration scene which used multiple layers; the fire, the background sand, the layer of me falling back, the multiple alpha and luma shock-wave layers that had been animated and which altered the speed at which parts disappeared and changed color. The skeleton that was pin warp animated to follow my movement and the inside flesh layer used to make it appear 3D. To learn how to do this I went back to a tutorial I had watched a while back, thought there are many more tutorials that do follow the same methodology:
The transitions in my edit changed throughout, though they are mainly straight cuts, I did have some fades in there (fades to black removed due to popular demand) were I transition from a fire ball to my dancer on the ground. I’ve learnt while editing this film how to use levels to create a transition, but like fades to black they have there place. many of the cuts and pacing I am happy with in this film, however there are still a few areas that had I more time I would like to try new ways of cutting, even if it required another shoot day to act as filler (b-roll ambiance for instance.)
After all the killing of darlings and cutting for pace I felt mixed feelings about were my edit was. I liked it and it tells the overall narrative, however I would like the narrative to have been stronger as it has been in the past. This has been an issue I have identified before, however and I realize that I must have been doing something wrong as I clearly haven’t learnt from my mistakes yet, so in my next film the narrative will be my absolute focus, it will be simple, well developed and everything shall revolve around it. When I edit I know that the story is going to be told in full within the time constraints and that it will be told with good understanding and the best possible fundamental techniques.
I don’t feel that this has been my finest hour for editing however I feel I have a better understanding of the cutting hierarchy for example the pace in this film had a greater priority than the continuity and performance higher still. This was evident especially in my first cuts in which I had the story, but the all important amulet had the mysterious power to vanish then re-appear, get torn off then be back again (though with re-editing this was no longer a problem.)


rough cuts:
Fire Effects
https://www.youtube.com/watch?v=26mzWSt2mXo
https://www.youtube.com/watch?v=7625Mvifqu8
https://www.youtube.com/watch?v=t2tgyY7ectM
In my above tests I found that I was able to use both of the methods discussed in my research and discovered from playing with the settings in the particle renderer that I can achieved a better result in my renders by boosting the vorticity and dropping the voxel (3d pixel) size however this also effected my render time so that it was taking much longer to complete than I had hoped. On the footage I found that I quite liked the contrast I could achieve by manipulating blues skin tones and brightness on the original footage however I also found that in places this wasn’t working due to the brightness in the sky and the digital distortion it caused on the sand when the sun hit it directly..I tried using rotoscoping to sort this out (sky replacement) however after three weeks of going in every day rotobrushing frame after frame I found that this although it made certain scenes look really amazing there was no way that I could get it finished and have it all at the same standard so at this point I painfully decided to kill my darlings and get rid of all that work which all though it felt like I had wasted three weeks I had learnt a very valuable lesson and was able to deal with it. I did decide however that I liked having a vignette over the footage as it certainly controls the interest and as my footage is very even and balanced in its original color and so can do with something to help draw attention to the center frame.
To make the fire look good I used the following base settings though some of these changed depending on the scene:
Container:
Simulate while rendering: 1
Voxel size: 1.6
Grid size: 1213.339 X 364.002 X 485.336
Frame sub-step limits: 5
Pressure iteration limit: 1
Adaptive container: 1
Velocity advection: 1st order
Channel advection: 1st order
Adaptive tracer: 0
Cubic interpolation: 1
Less memory more time: 0
Collision objects enlarge container: 1
Smooth collision surface render: 0
Closed container boundaries: -Y 1
Up-res scale: 2
Fine turbulent intensity: 7.28
Fine turbulent small power: 0.58
Time scale: 100%
Velocity low clip: 2426.679
Velocity dampening: 0%
Particle velocity scale: 0%
Wind direction: 1,0,0
Vorticity: 10
Turbulence intensity: 20
Smallest size: 4.853
Largest size: 19.413
Small power: 0.56
Period: 25
Temperature active: 1
Clip below: 0
Temperature diffusion: 0
Cooling: 10%
Half life: 6.58
Buoyancy: 2.427
Buoyancy direction: 0, 1, 0
Frame offset: 0
Frame step: 1
Step size: 50%
Shadow step size: 50%
Interpolation: smooth
Emitter:
Birthrate editor: 1500
Birthrate editor: 15000
Visibility: 100%
Start emission: 0F
Stop emission: 129F
Seed: 2
Lifetime: 36
Lifetime variation: 20%
Speed: 200
Speed variation: 18%
Rotation: 0
Rotation variation: 100%
End scale: 1
End scale variation: 0
Tangential: 0
Emitter type: cone
X size: 6.177
Y size: 6.177
Angle horizontal: 5
Angle Vertical: 0
Gravity:
Acceleration: 200
Shape: sphere
Size: 100,100,100
Scale: 48%
Falloff: 50%
Falloff function: spline
Clamped: 1
I rendered and re- rendered at these settings mostly but changed them occasionally if the outcome was really bad like this example:
Before: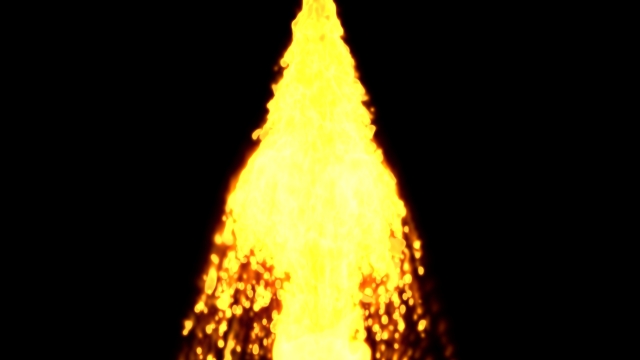
After:
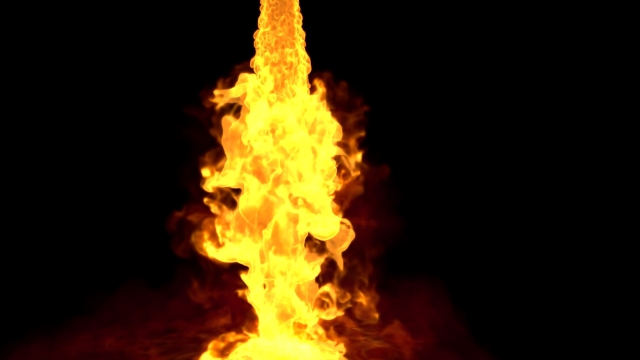
To animate the fire itself I key frame animated the emitter’s type size rotation and position to match the orientation and 3d position of the subjects hand within the container using a jpeg sequence as a background to base my positioning after my tracking hadn’t worked for the same reasoning as my rotobrushing hadn’t worked ( motion blur, fine edges, low contrast). The issues that arose with this was that if I touched the mouse wheel or certain keys my view would move with the background but not the particles so I would have to try and reset my view the way it was or start again. Once done I would 3d model a basic person and set them as an animated collision object within the container (gravity was controlled in this same way) this was then set to render with the background and collision objects defined as invisible. The longest fire scene took 36 hours alone to render and in total the fire ended up taking about three weeks to animate and render as a jpeg sequence.
